
Some of the links in this blog post are affiliate links, which means I may earn a commission if you make a purchase through them. This comes at no additional cost to you and helps support the content I create. I only recommend products and services that I genuinely believe in and think will be valuable to you. Thank you for your support!
From ‘Ralph Lauren Christmas’ to ‘Handmade Christmas’ – it seems that in 2025, we are trending toward a more traditional holiday ambience. I’m not opposed to it at all. I, too, am appreciating more and more the traditional greenery and color schemes of the 90s.
I think most of the magic and Christmas spirit that shines through in more traditional holiday decor is achieved through a mix of both curated and handmade pieces. This directly counteracts most of the cold modern decor that is so prevalent nowadays. When the entirety of holiday decor is store-bought and perfectly matching, it takes away the whimsical feeling of childhood and, most importantly, home.
This year, I want to bring back that homey Christmas feeling by creating a few simple, handmade decorative pieces. I am loving all of the inspiration I’ve been seeing online, like dried orange garlands, cardstock chains, window art, and more. There is so much inspiration to pull from – I made sure to start in November, so I have plenty of time to enjoy it all.
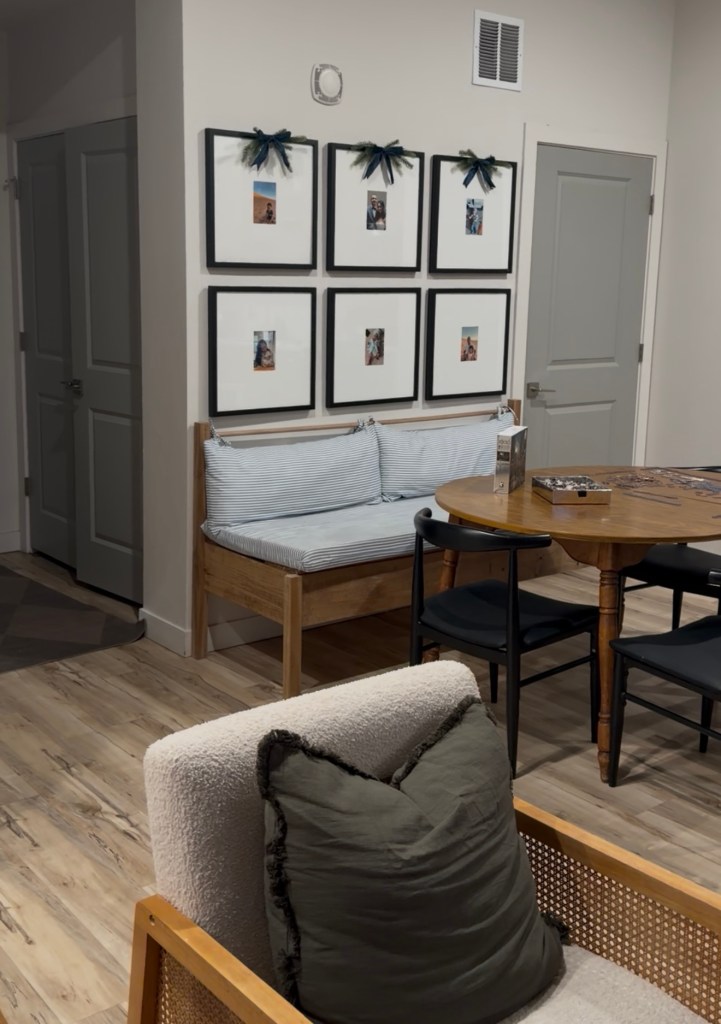
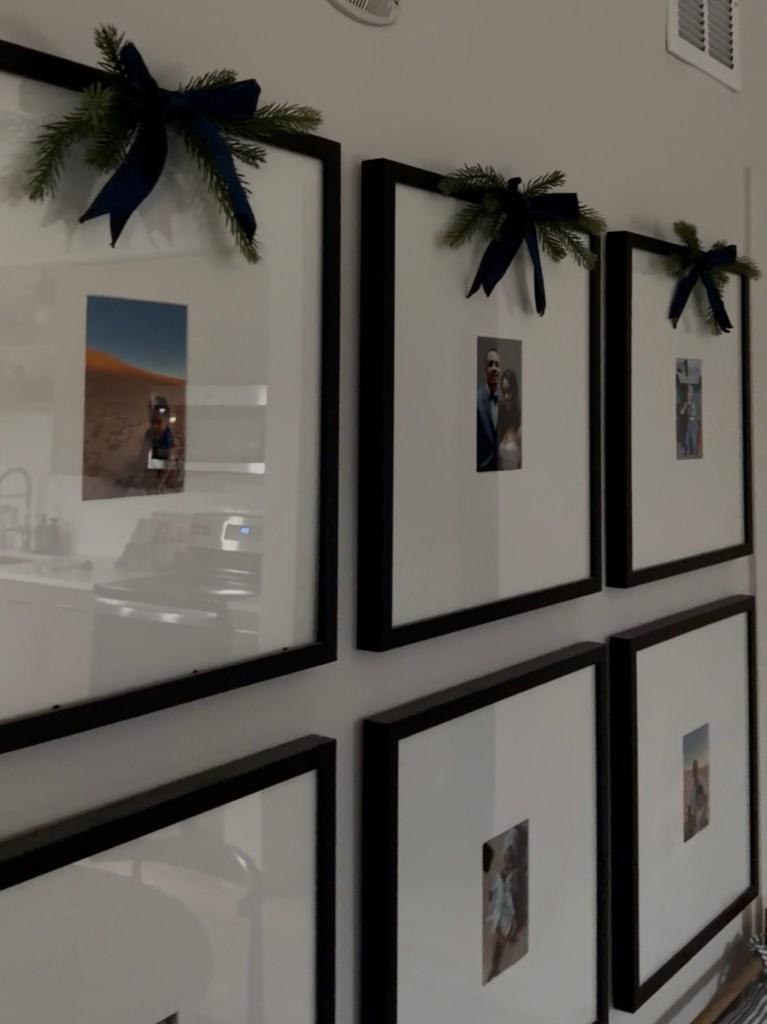
To start, I created gallery picture frame bows! By simply combining faux pine greenery and velvet ribbon, I topped the top half of my gallery wall with this simple decorative piece, and feel like its made such an impact in seasonal decor. Not only is this DIY craft easy, it’s affordable – comprising of just two pieces. I can’t wait to incorporate these picture frame bows into my holiday decor moving forward.
Here’s how I made them:
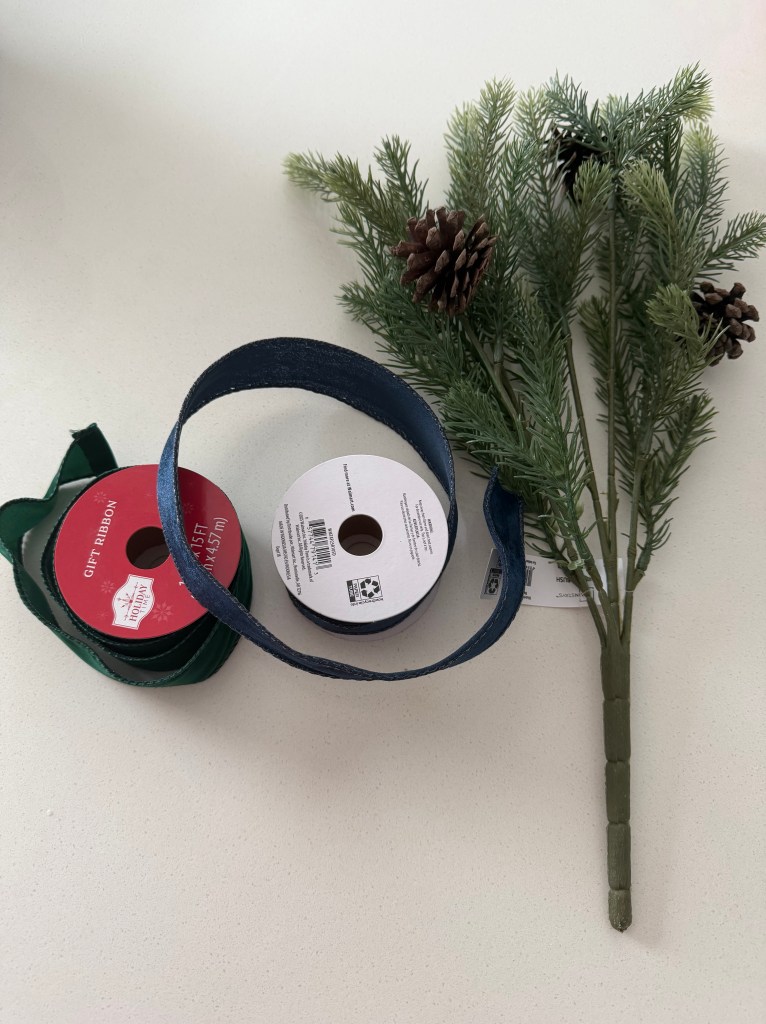
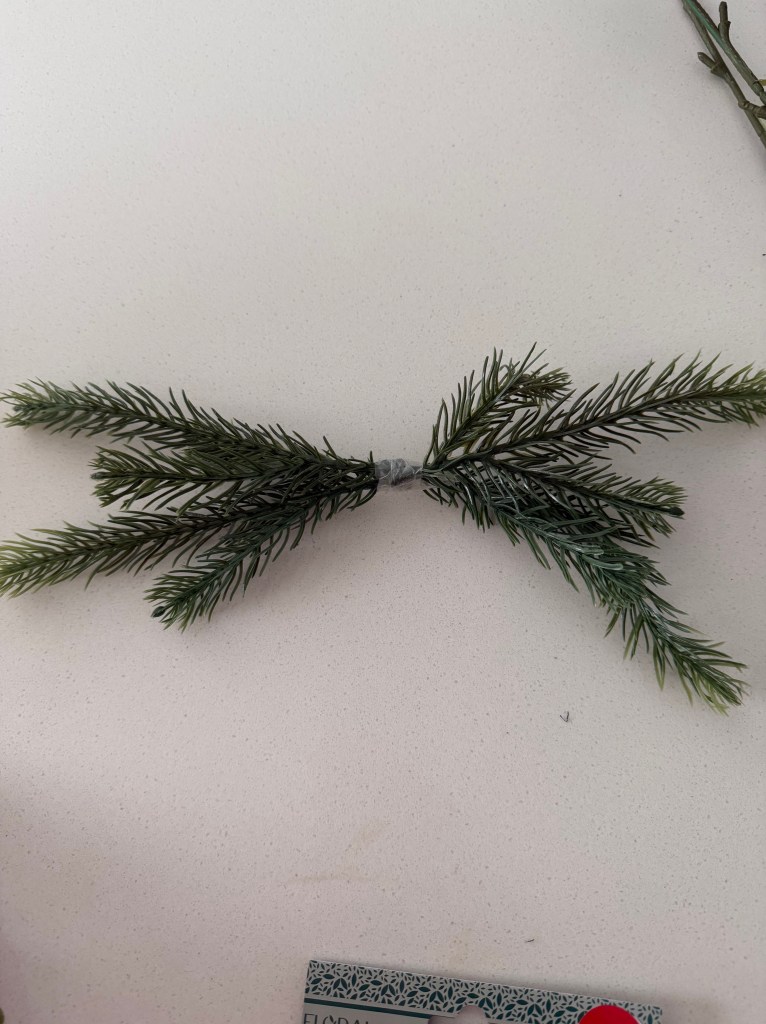
I purchased just one pine greenery stem and a single round of 1.5-inch velvet wired-ribbon.
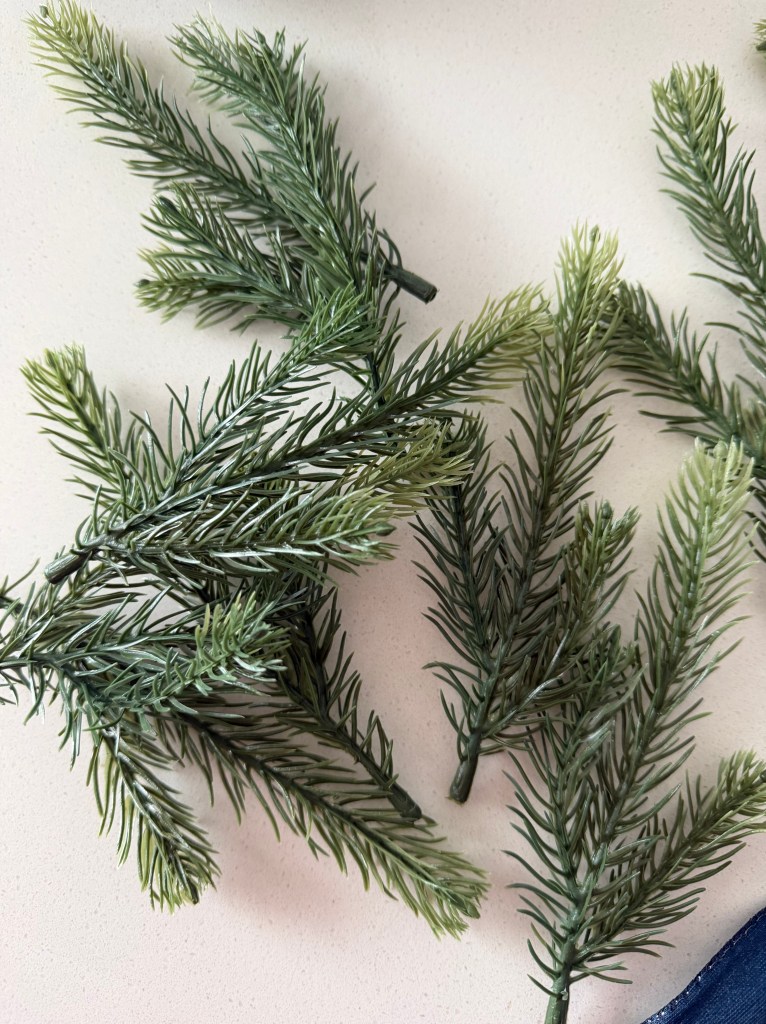
Then, I removed the individual branches of pine from the stem, and using some scotch-tape, bound four pieces together (two on each side) to create a backing for the ribbon bow.
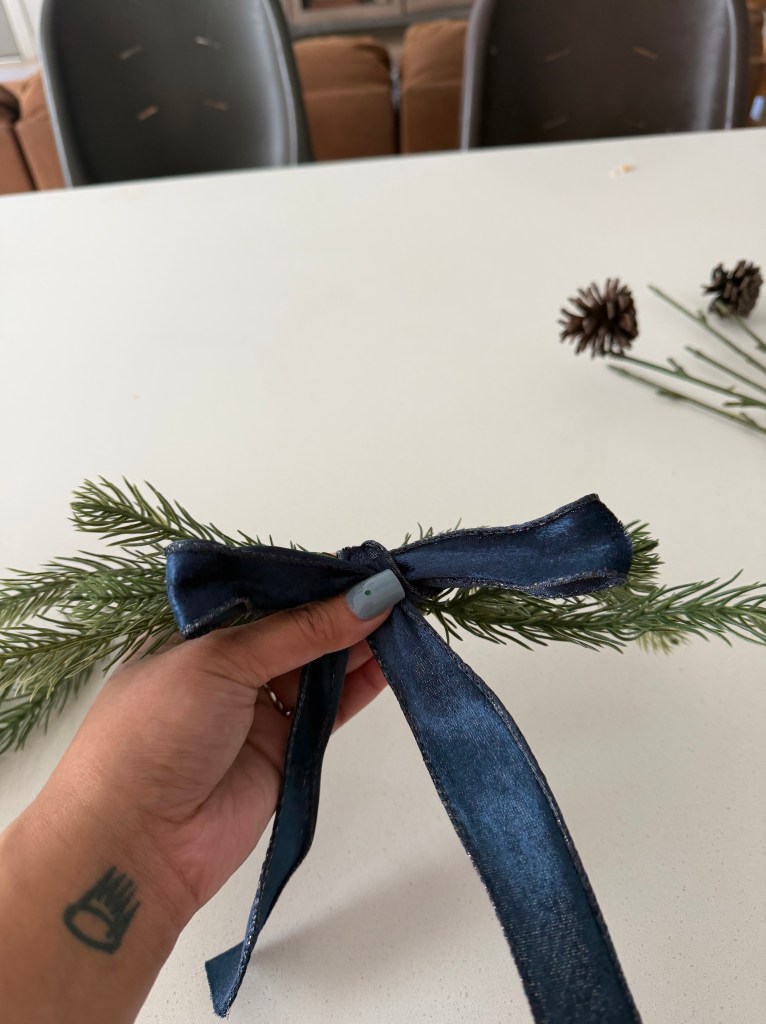
Once the greenery was tightly attached, I cut about 1-foot of ribbon and tied it around the greenery to form a bow. I made sure to straighten and flatten the bow as much as possible. For this DIY-craft, I highly-recommend wired-ribbon, as it holds its shape best.
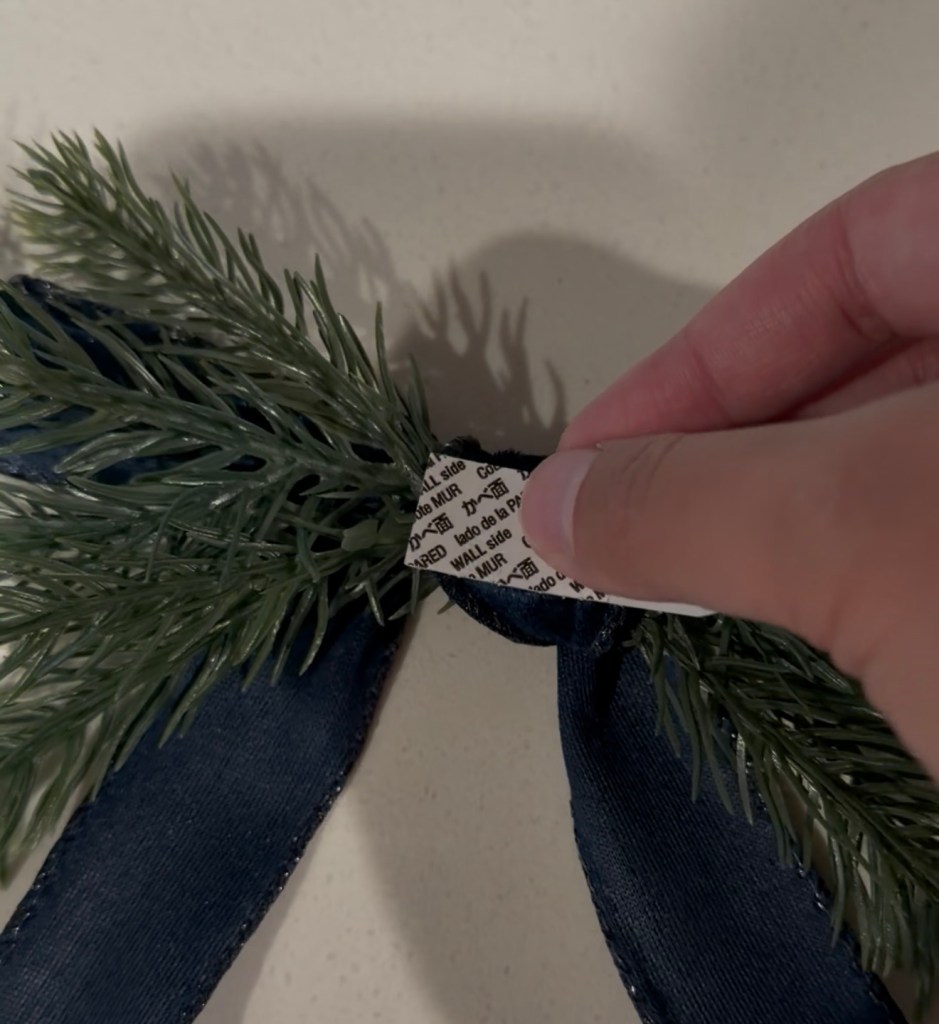
Next, I applied command tape to the back of the bow and my three picture frame bows were ready for decorating!
I attached mine to the three top picture frames on my gallery wall, but you can place one on each in whatever pattern or array you prefer.

I love how this DIY Christmas decor turned out and can’t wait to incorporate more handmade crafts into my seasonal designs!


Leave a comment