Some of the links in this blog post are affiliate links, which means I may earn a commission if you make a purchase through them. This comes at no additional cost to you and helps support the content I create. I only recommend products and services that I genuinely believe in and think will be valuable to you. Thank you for your support!
Decorating my daughter’s nursery has been an ongoing project. So much so, that I’m not even sure I can still refer to her room as a nursery anymore. She’s over a year old now and I’ve just recently gotten around to adding window treatments. Looking back on the past year, though, I have to admit – I think it was the ultimate missing piece.
About halfway through my pregnancy, I refurbished a used solid-wood dresser I purchased off of Facebook for the nursery (Holy Nesting). I sanded down the paint, whitewashed the wood, and added lavender paint and gold hardware. Having grown tired of the sad beige baby rooms, I wanted to add color to my baby’s nursery, and a variety of them. The dresser I up-cycled served as the focal point and inspiration for the rest of the room’s decor.

Following the completion of the dresser, I added a changing basket to place on top, a gold circular mirror to hang above, and DIY’d a sonogram framed photo. From there, I purchased a neutral wood-toned crib to match, a glider, wall decor, floating shelves, and these adorable scalloped wireless, battery-operated wall sconces. At this point, the room was decorated with neutral wood tones, lavender, gold, pink, and green.

I carried on the theme of various pastel-colored decor by adding light pink curtains. When deciding what I wanted to do to the windows in the room, I came across this adorable curtain set on Pinterest. I scoured the internet in search of the original source to try to purchase it, but had no luck.

That, of course, didn’t stop me, though. I decided to DIY the curtains. In my own room, I had 4 panels of white 98-inch Ritva curtains from IKEA. Having plain white rooms throughout our apartment, I knew already that I didn’t have any purpose for these curtains and so I sourced them for my DIY project.

To achieve a baby pink color, I used Rit Dye in the shade Petal Pink.


ProTip: If you’re using Rit Dye to dye any fabric, use your washing machine! It can hold a lot of fabric, fill with hot water, and drain easily – all without staining, like your bathtub might. **I only recommend this if your washing machine has a soak setting or allows you to pause the cycle after it has filled. Otherwise, it will likely drain prematurely, preventing your fabric(s) from dying for the recommended amount of time and potentially coming out splotchy.
During the dying process, I only needed about 4 cap-fulls of dye for all four panels and soaked them for a total of approximately 15 minutes. If you’re going for a deeper, more pigmented color, I would definitely recommend using more dye and soaking for longer. Prior to adding the fabric, I added about 1/4 Cup of table salt and mixed it through the water thoroughly, as directed.
I made sure to constantly move the curtains throughout the soaking process to prevent uneven dying of the fabric, rearranging everything every few minutes or so.
Immediately following the dye, I drained the washing machine, squeezed the excess water from the panels, and filled the machine once again. Once it was filled with hot water, I added fixative and mixed it thoroughly before adding the curtains back in and allowing it to soak as directed. This helps to seal in the color and prevent the transfer of color.
Next, I drained my washing machine a final time and let it run on a spin cycle to remove as much water from the curtains before allowing them to dry in my dryer on medium heat (This will vary, of ocurse, depending on your fabric type).

Once dry, I prepared 2 of the panels to cut, as these would act as my valence. Since I’m working with pretty long curtains, I opted to make my valence about 20-inches long. I measured out the length and pinned a line across to ensure a clean cut.
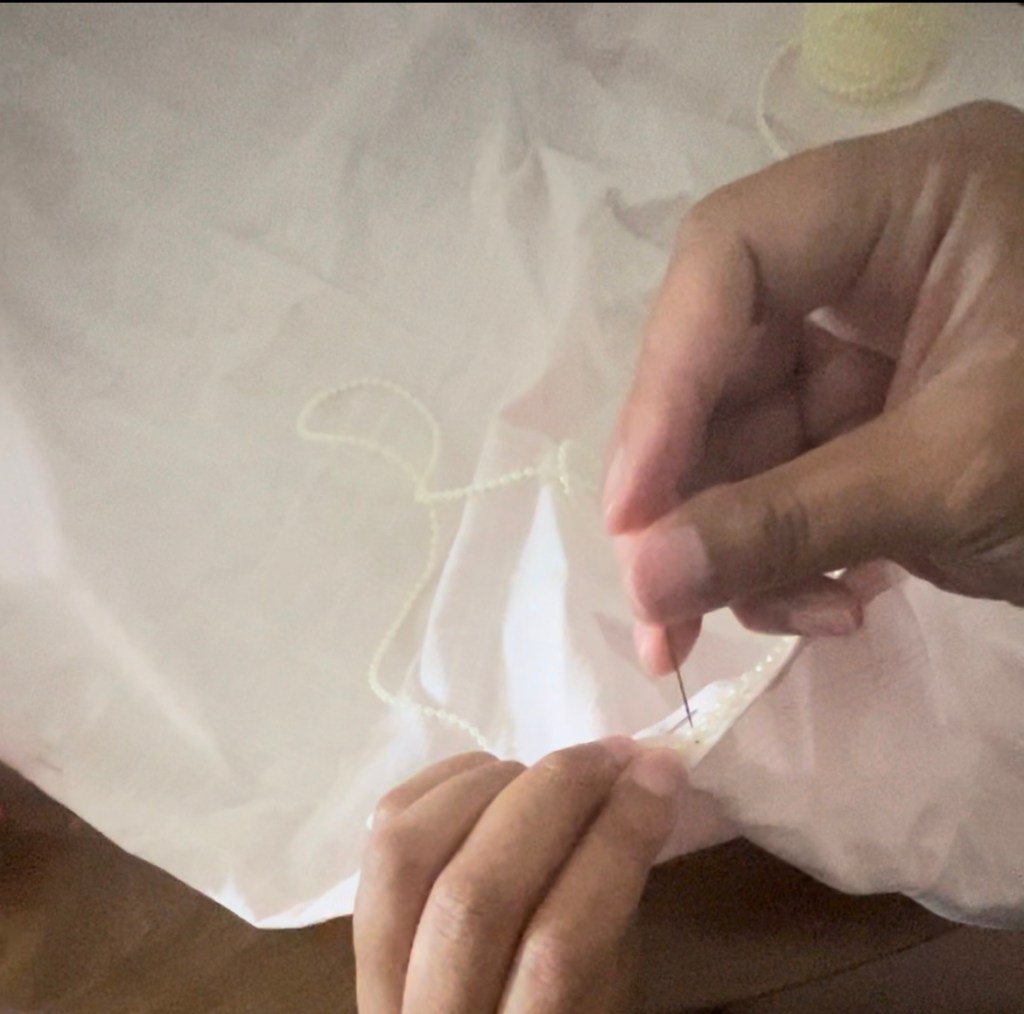
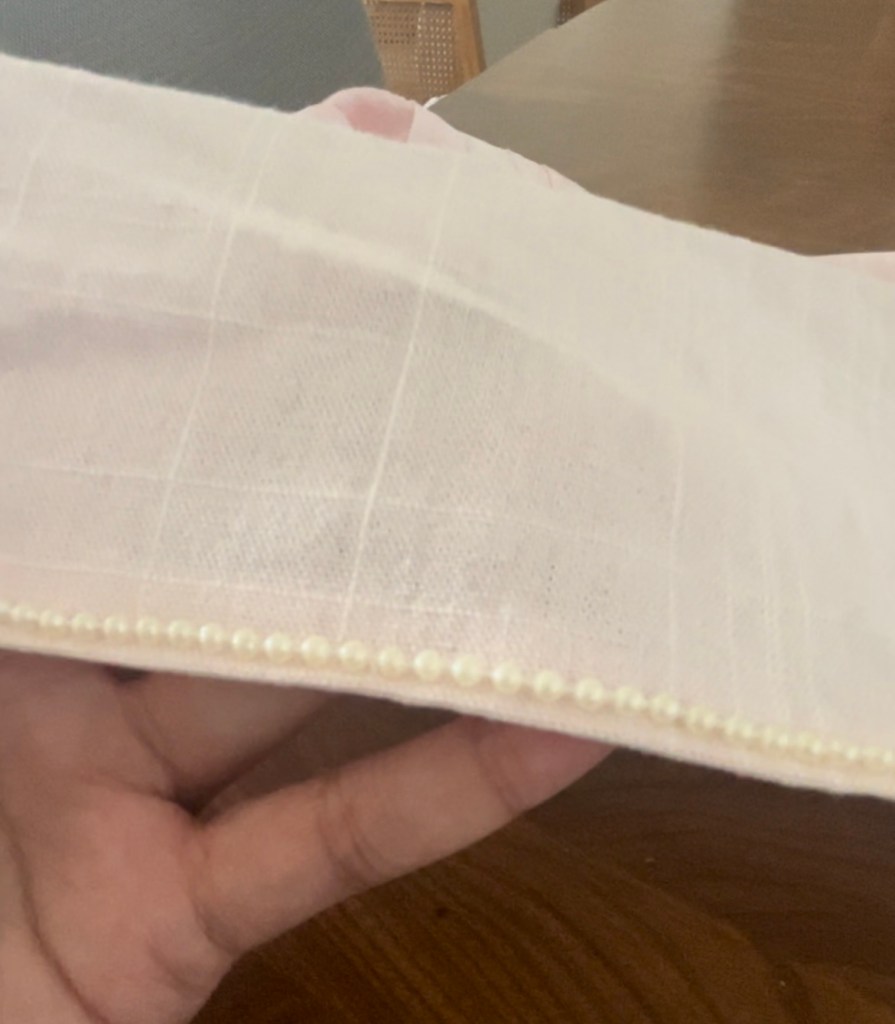
After I cut my fabric, I hemmed the bottom by folding over the bottom of the panels (about half an inch) and hand-sewed across to create a clean and solid edge. Once I had completely hemmed both panels, I used a spool of pearls to attach to the border, similar to what is seen in the inspo-pic.

Of course, if you own a sewing machine, this entire process can be done much quickly. However, that didn’t stop me. It can be done by hand with time and patience.
If I could redo this project, I would use a spool of larger pearls to better accentuate the border.
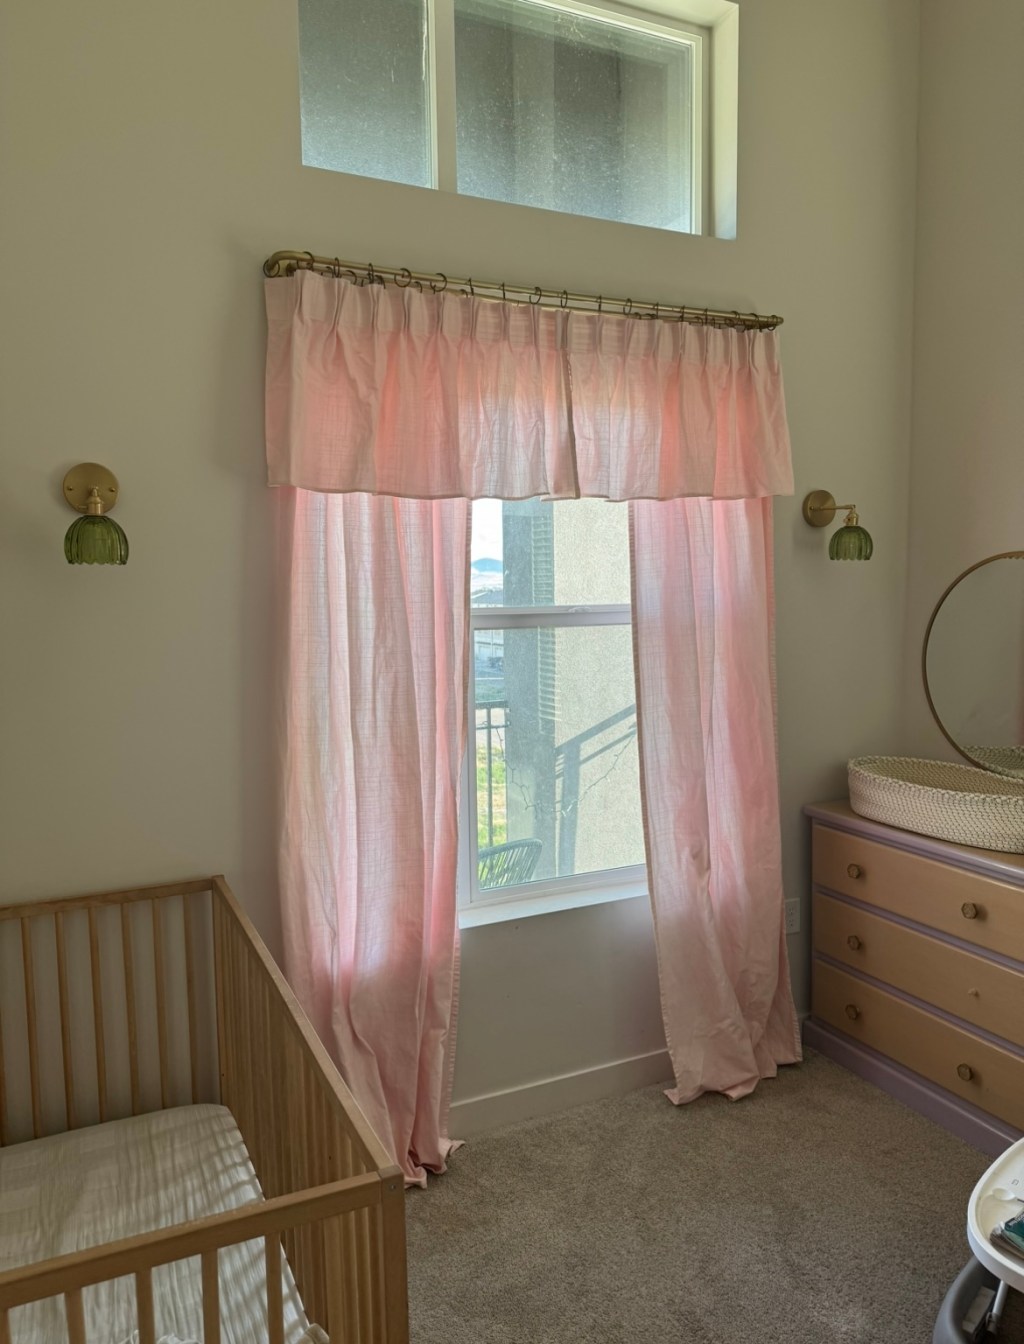
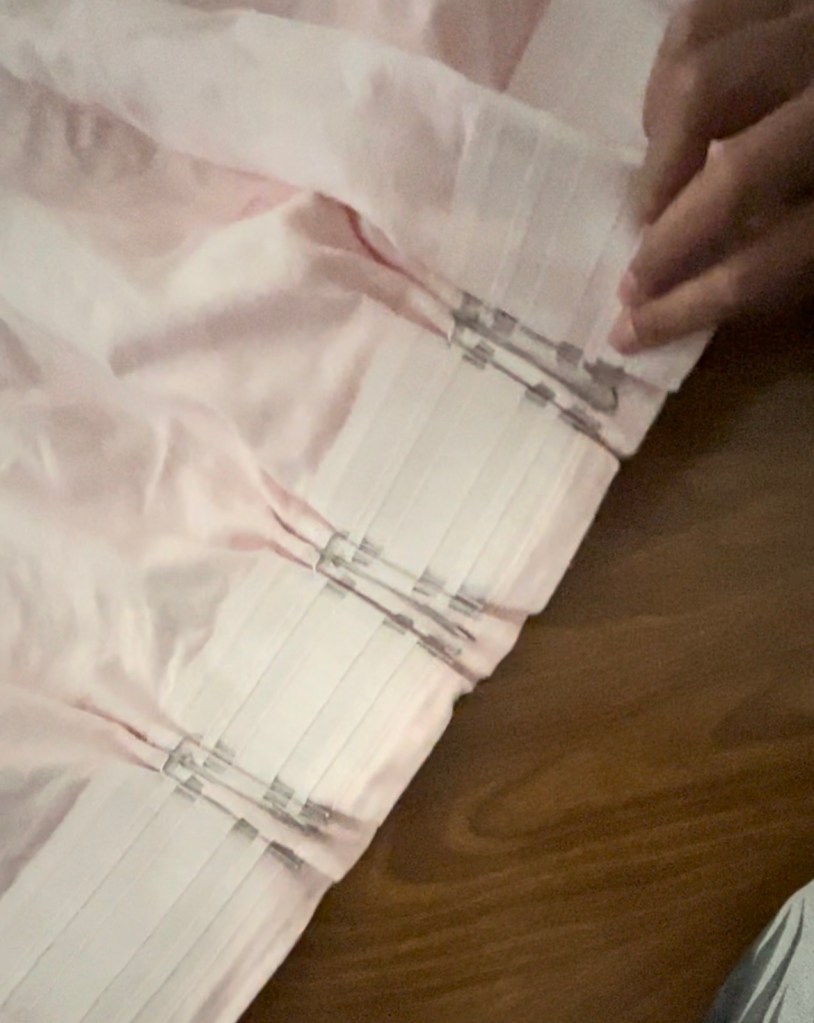
Once complete, I used drapery hooks to create a pinch-pleated look on all four curtain panels.
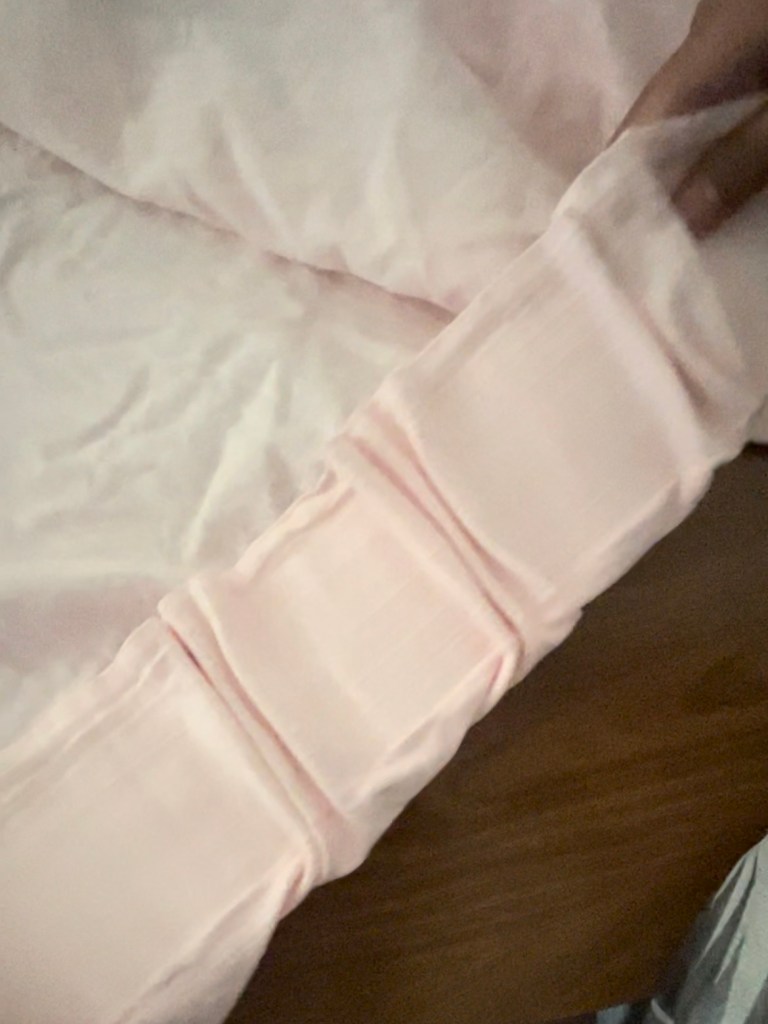
Using a gold double curtain rod and matching gold curtain rings, I hung the 2 full-length curtains on the back rod and the 2 shortened panels for my valence on the front rod. I evenly dispersed the curtains across the rods to my liking and got the final result –

I am so incredibly happy with how it turned out. I plan on hemming the bottoms of the longer curtain panels using iron-on hem tape and might revisit the valence to attach bigger pearls along the border, but for now, I am so glad I tried my hand at this DIY project! It fits her room so perfectly.
I hope you’ve found this tutorial helpful or have taken some inspiration from it. I look forward to creating and sharing more DIY decor!


Leave a comment