
Some of the links in this blog post are affiliate links, which means I may earn a commission if you make a purchase through them. This comes at no additional cost to you and helps support the content I create. I only recommend products and services that I genuinely believe in and think will be valuable to you. Thank you for your support!
I am always looking for fun new craft ideas for myself and my kids. It seems that the latest trendy craft is DIY Air Dry Clay. I recently saw a post of someone making Valentines-themed heart-shaped clay magnets with the thumbprints of their little ones and had to try my hand at it! Although I loved the idea in theory, once I began working with the clay, I realized it was practically impossible to actually imprint one’s detailed fingerprint onto clay in any recognizable way. So, instead, I opted for mini food magnets.
The process is so simple, especially when using air dry clay. It takes minimal effort and the possibilities are endless. Pinterest was an incredible source of inspiration (as it always is) for ideas.
My children are ages 4 and under, so they are a bit limited in ability when it comes to molding the clay into food shapes, however, they were able to help me paint. 🙂
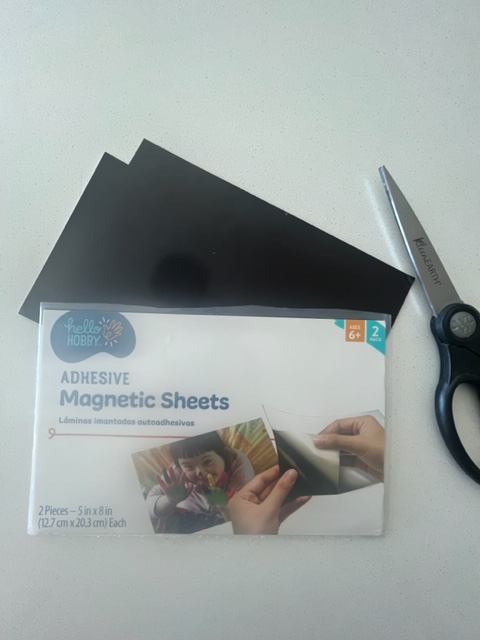
To start, you’ll want to grab some air dry clay. I found that the smallest container size they offer is more than enough for my food magnet project. A little goes a looong way. Additionally, you can pick up a few tools to help manipulate the clay better. I opted to just use whatever I had on hand, including a butter knife, the end of a small paintbrush, and my bare hands.
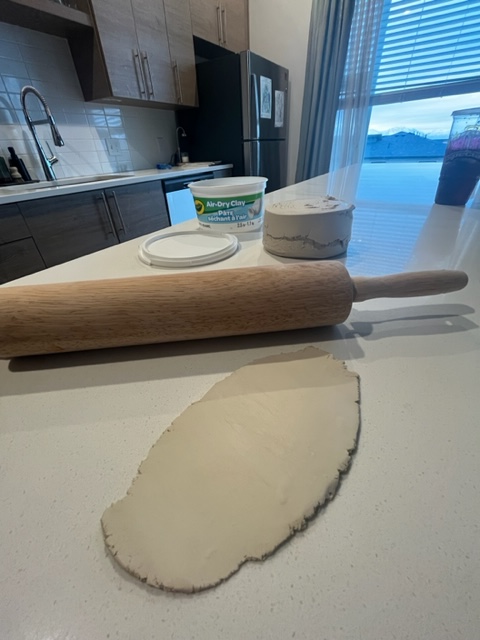
Using a rolling pin, roll out your clay until it’s to your desired thickness. For magnets, I chose a thickness of about 1/4 of an inch.
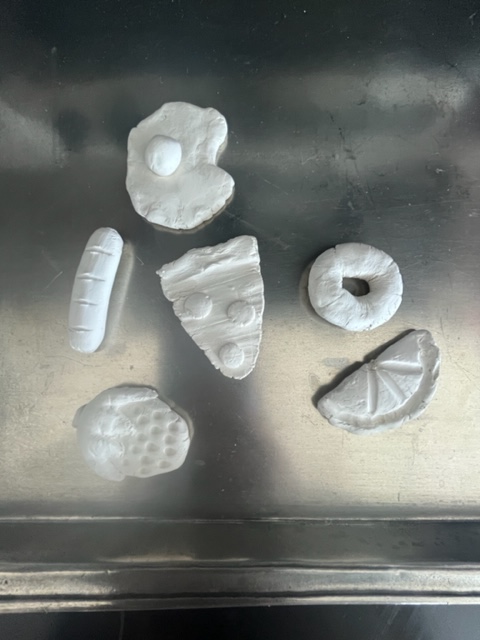
Cut out your desired magnet’s shape, using your hands and tools to mold it the way you like. I found my hands to be the most helpful in creating various shapes such as a pit for my avocado, a yolk for my egg, and in shaping a donut.
I found a few inspo pics of food clay magnets to reference and did my best to emulate their shapes, using a bit of water to bind multiple pieces.
My favorite part about air dry clay is that there is no baking process, like that of salt-dough. You simply leave it out overnight, or for several hours, to dry and it’s ready to paint in the morning.
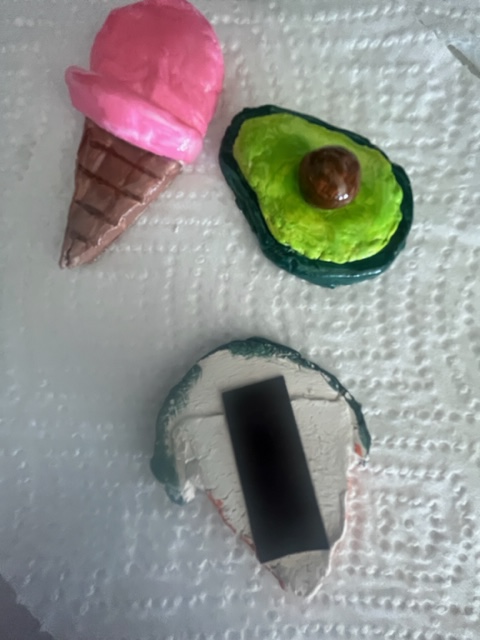
By morning, my magnets were ready to paint! You want to ensure that your clay pieces are bone dry before painting. I also found that paint dries fairly quickly on air dry clay, so you won’t have to wait too long if you plan on adding a second layer or multiple colors.
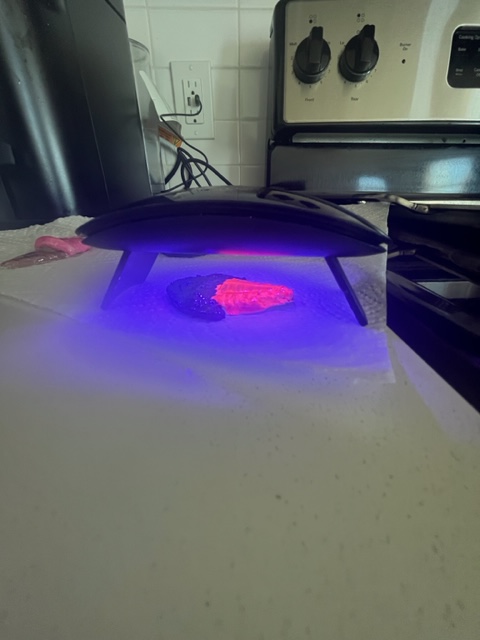
Once dry, you want to seal your work. You can use resin, which is common, however, requires more caution to work with. I opted for, again, something I had on hand – gel top coat polish. Yup.
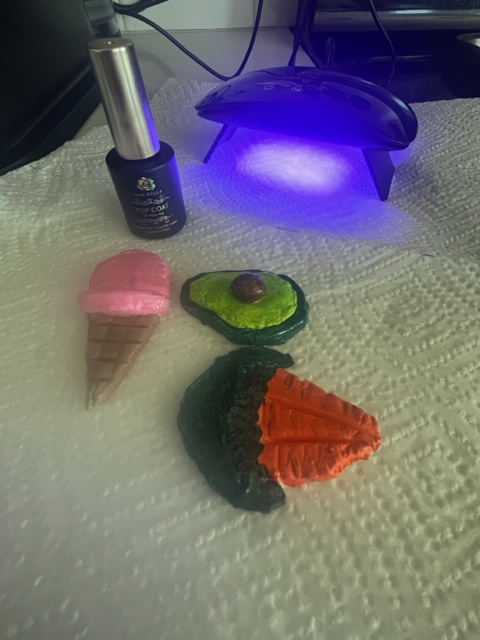
This worked like a charm, especially when cured under my UV light I use to give myself a fresh at-home mani-pedi.
Simply apply a coat of gel top coat polish evenly across the surface of your magnet and cure it under your UV light for approximately 30 seconds and longer if it hasn’t fully cured.
Next, apply a small piece of magnetic sticker to the backside of your magnet.
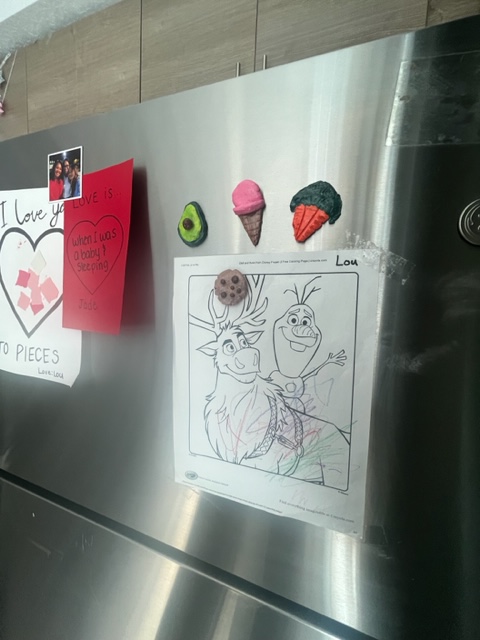
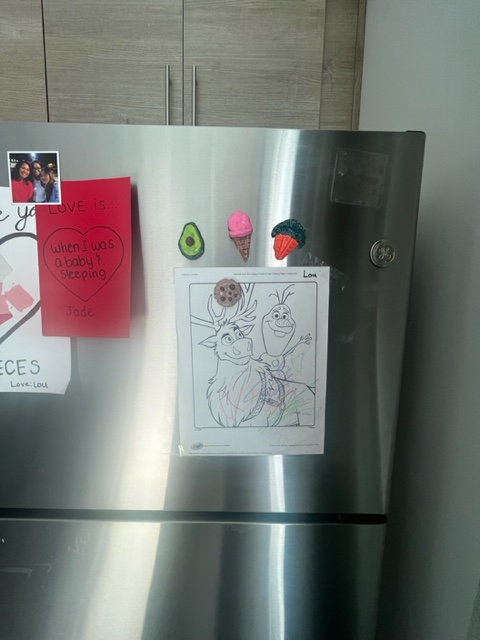
Finally, place your magnets on your fridge for display or to hold any photos or documents and you are all set.
Have you tried making crafts with air dry clay? What should I create next?


Leave a comment