Since I was a kid, I have always loved to decorate gingerbread houses. I loved the creativity of bringing a winter wonderland to life through a popular and beloved Christmas tradition. As a child, I utilized graham crackers and store bought frosting, however, as a Mom, I knew I wanted to up the anti for a fun and festive gingerbread house decorating night.

Although I love and prefer the taste of graham crackers, they aren’t the sturdiest when it comes to constructing a gingerbread house. For this reason, I opted for pre-built gingerbread houses. Not only were these incredibly affordable from Target, but it allowed everyone to focus on the truly fun part – decorating.

Unfortunately, it appears that Target either no longer sells these kits, or they are only available in store. (Here is a pre-built alternative from Target and from Wal-Mart that requires no assembly.)
The particular kit I picked up came with all of the pieces of the gingerbread house, but required assembly and also included no icing. I was fine with this as I knew I wanted to get extra icing anyway for decorating and it made each house extremely affordable, around $5-8, if I remember correctly.

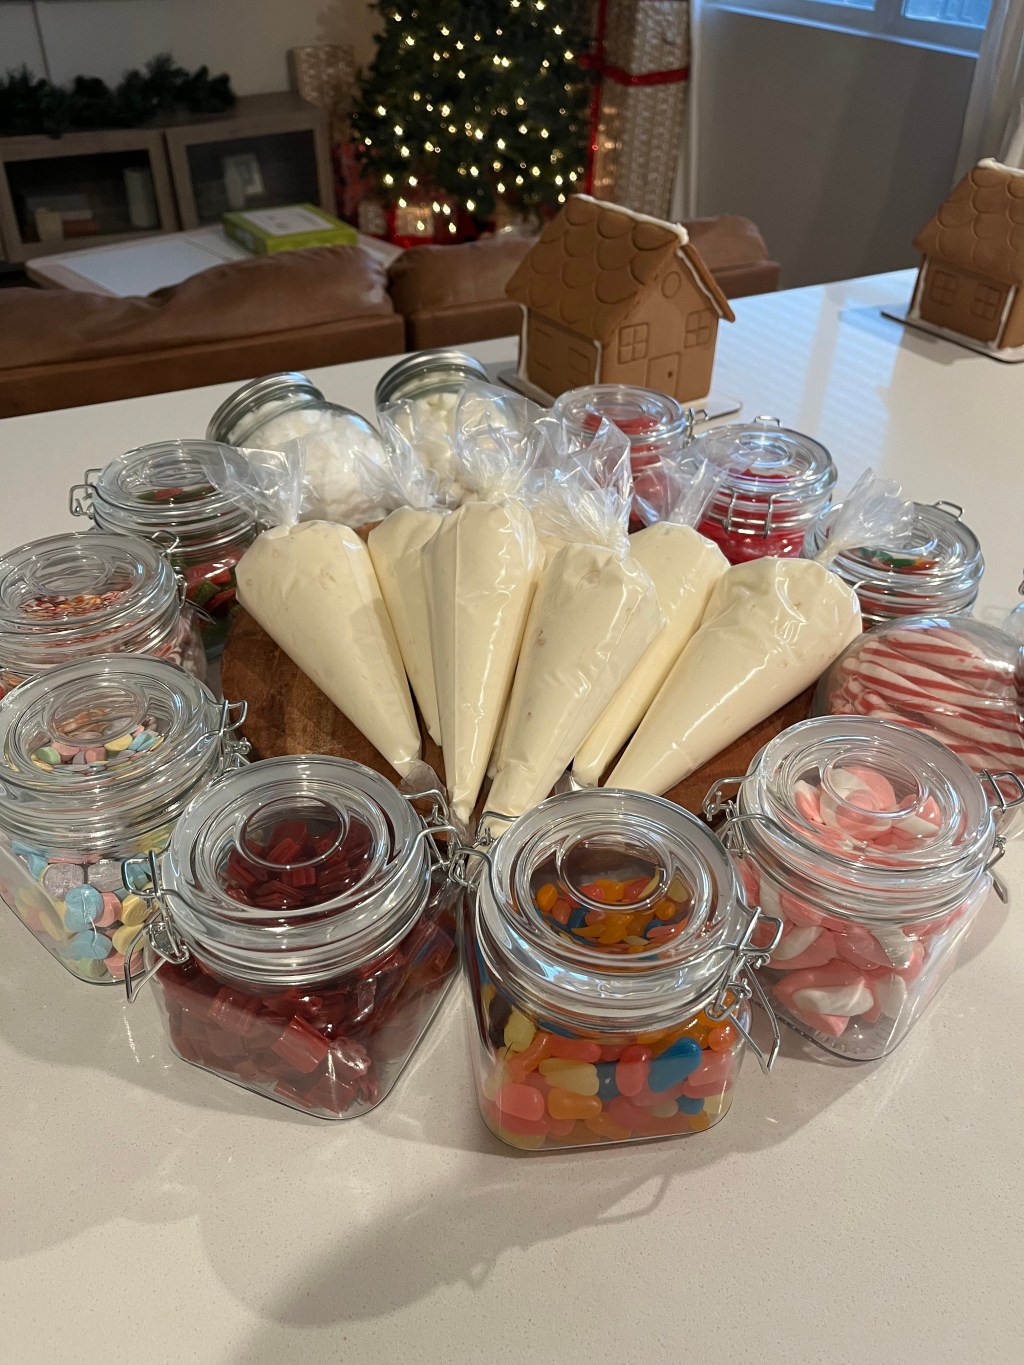
What I did was pick up vanilla frosting from The Dollar Tree, along with piping bags. (They carry 10 oz containers for $1.25, however, you could also pick up a 16 oz container from Target for only approximately 50 cents more.) I filled a piping bag with the pre-made frosting, and carefully constructed each of the houses onto the provided square cardboard boxes from the kit. (A few of the pieces were cracked or broken, but were surprisingly simple to fix with minimal effort using the frosting.)

The cake frosting holds up very well! I’d say better than the icing provided in gingerbread kits. You don’t need any special frosting tips for this project. You can, of course, use them, but I found that just by snipping a 2-3 cm hole at the end, I had plenty of control over the amount of frosting dispensed. To ensure the frosting didn’t dry out, I waited until my guests arrived and were ready to decorate to snip the end of their piping bag. To tie the opposite end, I also used a small piece of scotch tape to ensure none of the bags came undone. (You could also opt for bread ties.)
For decorating the gingerbread houses, I grabbed several bags of candy from The Dollar Tree, as well as jars to hold them. I picked up two different types of jars, both glass with lids and perfect for displaying and holding the variety of candy. These jars are so versatile and I’ve used them over the past year for several different and fun craft and kitchen ideas, including my DIY Dollar Tree Hot Cocoa Bar.


The Dollar Tree is great option to utilize for stocking up on candy decorations for your gingerbread houses, as they offer so many and at such an affordable price! I was incredibly proud of my arrangement and my Dollar Tree carries quite a bit of candy, including festive holiday options.
Here is a list of candies I picked up from The Dollar Tree:
- Traditional Peppermint Mints
- Flavored Mints (for color)
- Cotton Candy
- Mike & Ikes
- Watermelon Peach Rings
- M&Ms
- Mini Licorice
- Red and Green Rips
- Mini Candy Canes
- SweeTarts
- Christmas Marshmallows
- Mini Marshmallows
- Dots
Each person had their own piping bag to decorate their gingerbread house with and there was plenty to go around, with lots left over.
The night was a success and, needless to say, so much fun! I plan to continue this tradition every year, most likely at the start of the season to display each of our gingerbread houses throughout the months. Which house is your favorite?


Leave a comment